Building Your First Image Classifier with PyTorch: A Step-by-Step Guide Using the MNIST Dataset - I
Content:
🧠 Section 1: The Magic of Image Classification
🌍 What is Image Classification?
Image classification is one of the most fundamental tasks in the field of computer vision, where the goal is to teach a computer to identify and categorize objects in an image.
For example:
-
Determining if a photo contains a cat or a dog 🐱🐶
-
Identifying whether an X-ray scan shows signs of pneumonia 🩻
-
Recognizing handwritten digits for automated banking systems 🏦
At its core, image classification is about mapping pixel data → class labels.
Mathematically, we can express this as a function approximation problem:
[
f: X \rightarrow Y
]
Where:
-
( X ) = input image (a matrix of pixel values, e.g., 28×28 grayscale values)
-
( Y ) = label (e.g., digits 0–9 for MNIST)
-
( f ) = neural network that learns this mapping through training
When the model correctly predicts the label for an unseen image, it shows that it has learned meaningful patterns rather than memorizing data.
📚 Why MNIST is the “Hello World” of Deep Learning
The MNIST dataset (Modified National Institute of Standards and Technology) is one of the most famous datasets for beginners in deep learning.
It contains:
-
🧩 70,000 grayscale images of handwritten digits (0–9)
-
🏋️ 60,000 training images and 10,000 test images
-
📏 Each image is 28×28 pixels (784 total features)
-
🖊️ Labels represent the digits from 0 through 9
Example of MNIST image:
| Image | Label |
|---|---|
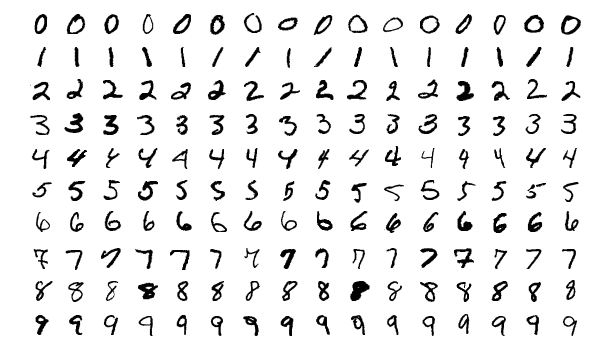 |
0–9 handwritten digits |
This dataset is simple, yet it captures the core challenges of computer vision:
-
Variations in handwriting styles
-
Different thicknesses, rotations, and sizes
-
Noise and distortions in the image
Because of this, MNIST provides an excellent foundation for learning how neural networks learn visual patterns — without needing massive computation power or complex preprocessing.
🚀 Real-World Relevance
You might wonder — why should I care about classifying handwritten digits?
In fact, the techniques learned from MNIST are directly applicable to real-world AI applications that rely on pattern recognition.
Here are some examples:
🏦 1. Banking and Cheque Processing
Banks use handwriting recognition to automatically read handwritten digits on cheques and forms.
Models trained on MNIST-like datasets can extract account numbers, dates, and amounts from scanned documents.
🛫 2. Postal Services
Automated sorting machines use digit recognition to read postal codes on mail envelopes, speeding up the mail distribution process.
🧠 3. Medical Diagnosis
Although not directly digits, similar CNN architectures are used in medical image classification — for example, detecting tumors or fractures from X-rays.
📱 4. OCR Systems and Mobile Apps
Optical Character Recognition (OCR) apps like Google Lens and CamScanner rely on deep learning models similar to those used for MNIST — they just work on more complex character sets and lighting conditions.
🤖 5. Autonomous Systems
Self-driving cars and robots rely on image classification to identify road signs, pedestrians, and obstacles — again, extending the basic ideas of MNIST to larger, more complex datasets like CIFAR-10 or ImageNet.
🔍 Why Image Classification is So Fascinating
-
It mimics human vision.
Neural networks try to process pixel data the same way our brain interprets visual information. -
It connects art and science.
A simple 28×28 image, when passed through a neural network, gets transformed into mathematical features that the model can “understand”. -
It’s the foundation of modern AI.
Technologies like facial recognition, object detection, and visual search are built upon the fundamental idea of classifying images.
Sponsor Key-Word
"This Content Sponsored by SBO Digital Marketing.
Mobile-Based Part-Time Job Opportunity by SBO!
Earn money online by doing simple content publishing and sharing tasks. Here's how:
Job Type: Mobile-based part-time work
Work Involves:
Content publishing
Content sharing on social media
Time Required: As little as 1 hour a day
Earnings: ₹300 or more daily
Requirements:
Active Facebook and Instagram account
Basic knowledge of using mobile and social media
For more details:
WhatsApp your Name and Qualification to 9994104160
a.Online Part Time Jobs from Home
b.Work from Home Jobs Without Investment
c.Freelance Jobs Online for Students
d.Mobile Based Online Jobs
e.Daily Payment Online Jobs
Keyword & Tag: #OnlinePartTimeJob #WorkFromHome #EarnMoneyOnline #PartTimeJob #jobs #jobalerts #withoutinvestmentjob"

💡 Key Takeaway
Before jumping into complex architectures like ResNet or Transformer-based vision models, every AI developer should first master the MNIST digit classifier.
It’s not just a beginner’s project — it’s a gateway to understanding how deep learning works:
-
How data is represented as tensors
-
How weights and biases learn patterns
-
How loss functions guide optimization
-
How we measure accuracy and performance
By the end of this project, you’ll be able to:
✅ Load and explore real image data
✅ Build and train a neural network in PyTorch
✅ Evaluate its performance on unseen data
✅ Understand the fundamental workflow behind any image classification task
📘 Section 2: Understanding the MNIST Dataset in Depth
Before training any model, we must understand the data that feeds it — because data is the fuel that powers deep learning.
The MNIST dataset is simple, yet it perfectly illustrates how image data can be transformed into a machine-readable format for neural networks.
🧮 2.1 What Is the MNIST Dataset?
The MNIST dataset (Modified National Institute of Standards and Technology) is a large database of handwritten digits commonly used for training and testing image processing systems.
It contains:
-
60,000 training images
-
10,000 testing images
-
Each image is 28 × 28 pixels
-
Each image is a grayscale image (single channel, values from 0 to 255)
-
Labels correspond to digits 0–9
You can think of MNIST as a collection of thousands of small black-and-white pictures of handwritten numbers written by different people.
🧩 2.2 Structure of the Data
Each image is essentially a matrix of numbers representing pixel intensity.
For example, a single image looks like this:
[
\begin{bmatrix}
0 & 0 & 0 & 0 & 0 & 0 & \dots & 0 \
0 & 0 & 12 & 45 & 67 & 89 & \dots & 0 \
0 & 0 & 34 & 190 & 250 & 180 & \dots & 0 \
\vdots & \vdots & \vdots & \vdots & \vdots & \vdots & \ddots & \vdots
\end{bmatrix}
]
Each value represents the brightness of a pixel:
-
0 → completely black
-
255 → completely white
The goal of our neural network is to take this 28×28 pixel matrix, flatten it into a vector of 784 numbers (28×28 = 784), and then predict the correct label (0–9).
🧠 2.3 Training vs Testing Data
| Dataset | Images | Purpose |
|---|---|---|
| Training Set | 60,000 | Used to train the model and adjust its weights |
| Test Set | 10,000 | Used to evaluate the model’s performance on unseen data |
👉 Why this split matters:
It ensures that our model isn’t just memorizing data but is generalizing — meaning it can correctly classify digits it has never seen before.
🧰 2.4 Loading MNIST in PyTorch
PyTorch provides MNIST as part of its torchvision.datasets module.
It’s automatically downloaded and prepared for you — so you can load it with just a few lines of code.
import torch
from torchvision import datasets, transforms

# Define a transform to convert the images to tensors
transform = transforms.Compose([transforms.ToTensor()])

# Download and load the training data
train_data = datasets.MNIST(root='./data', train=True, download=True, transform=transform)
test_data = datasets.MNIST(root='./data', train=False, download=True, transform=transform)

print("Training Data:", len(train_data))
print("Testing Data:", len(test_data))
Output:
Training Data: 60000
Testing Data: 10000
Here’s what’s happening:
-
root='./data': specifies where to store the dataset -
train=True: loads the training set -
download=True: downloads if it doesn’t exist -
transform: converts PIL images to tensors for PyTorch processing

🎨 2.5 Visualizing MNIST Images
Let’s take a look at a few images to understand what the data looks like.
import matplotlib.pyplot as plt

# Visualize first 9 images from the training dataset
fig, axes = plt.subplots(3, 3, figsize=(6,6))
for i, ax in enumerate(axes.flat):
    image, label = train_data[i]
    ax.imshow(image.squeeze(), cmap='gray')
    ax.set_title(f"Label: {label}")
    ax.axis('off')
plt.show()
You’ll see a grid of handwritten digits — some neat, some messy — but all very human.
This step is essential before training any deep learning model:
✅ Always visualize your data before modeling.
Sponsor Key-Word
"This Content Sponsored by SBO Digital Marketing.
Mobile-Based Part-Time Job Opportunity by SBO!
Earn money online by doing simple content publishing and sharing tasks. Here's how:
Job Type: Mobile-based part-time work
Work Involves:
Content publishing
Content sharing on social media
Time Required: As little as 1 hour a day
Earnings: ₹300 or more daily
Requirements:
Active Facebook and Instagram account
Basic knowledge of using mobile and social media
For more details:
WhatsApp your Name and Qualification to 9994104160
a.Online Part Time Jobs from Home
b.Work from Home Jobs Without Investment
c.Freelance Jobs Online for Students
d.Mobile Based Online Jobs
e.Daily Payment Online Jobs
Keyword & Tag: #OnlinePartTimeJob #WorkFromHome #EarnMoneyOnline #PartTimeJob #jobs #jobalerts #withoutinvestmentjob"
⚙️ 2.6 Data Normalization
Neural networks learn better when input values are within a small range (like 0 to 1).
Since MNIST pixel values are between 0 and 255, we divide by 255 to normalize them.
transform = transforms.Compose([
    transforms.ToTensor(),
    transforms.Normalize((0.5,), (0.5,))  # scale pixel values to range [-1, 1]
])
This step helps improve:
-
Convergence speed (training faster)
-
Stability (reduces exploding/vanishing gradients)
Mathematically, normalization is:
[
x_{norm} = \frac{x - \mu}{\sigma}
]
Where:
-
( x ) = original pixel value
-
( \mu ) = mean
-
( \sigma ) = standard deviation
🚚 2.7 Creating Data Loaders
Data loaders allow you to iterate over your dataset in mini-batches instead of all at once — which is crucial for training efficiency.
from torch.utils.data import DataLoader

train_loader = DataLoader(train_data, batch_size=64, shuffle=True)
test_loader = DataLoader(test_data, batch_size=64, shuffle=False)

# View one batch
images, labels = next(iter(train_loader))
print("Batch shape:", images.shape)
print("Labels shape:", labels.shape)
Output:
Batch shape: torch.Size([64, 1, 28, 28])
Labels shape: torch.Size([64])
Explanation:
-
64 → number of images in a batch
-
1 → number of channels (grayscale)
-
28×28 → image size
This means our model will process 64 images at once — a balance between speed and memory usage.
🔍 2.8 Real-World Analogy
Think of data loaders like packaging letters in envelopes:
-
Each batch is an envelope containing 64 handwritten digits.
-
Each epoch means reading all envelopes once.
-
The model "learns" each time it opens an envelope (batch) and adjusts itself.
🧾 2.9 Summary of Section 2
By now, you’ve:
✅ Understood the structure of the MNIST dataset
✅ Loaded it using PyTorch’s torchvision.datasets
✅ Visualized and normalized the images
✅ Created data loaders to batch data efficiently
You’ve successfully prepared your data pipeline, the first critical step in deep learning!
⚙️ Section 3: Building a Simple Neural Network (Fully Connected Model)
Now that we’ve explored the MNIST dataset and prepared it with DataLoaders, it’s time to build our first neural network model in PyTorch — a Fully Connected Neural Network (FCNN).
This section will teach you how to:
-
Design a simple neural network architecture
-
Understand its mathematical operations
-
Implement it step-by-step using PyTorch
🧠 3.1 What Is a Fully Connected Neural Network?
A Fully Connected Neural Network (FCNN) — also called a Multi-Layer Perceptron (MLP) — is the simplest form of a neural network.
It consists of:
-
Input Layer: Takes input features (pixels in our case)
-
Hidden Layers: Learn patterns through weight connections
-
Output Layer: Produces final probabilities for each class (digits 0–9)
Each neuron in one layer is connected to every neuron in the next layer — hence the name fully connected.
🧮 3.2 Input and Output Dimensions
Each MNIST image is 28×28 pixels, i.e. 784 input features.
Each output corresponds to one of 10 classes (digits 0–9).
So:
-
Input size: 784
-
Output size: 10
-
Hidden layers: can vary — we’ll use two hidden layers for simplicity.
🔢 3.3 Mathematical Representation
A neural network computes outputs using the following equations:
[
z^{(1)} = W^{(1)}x + b^{(1)}
]
[
a^{(1)} = f(z^{(1)})
]
[
z^{(2)} = W^{(2)}a^{(1)} + b^{(2)}
]
[
\hat{y} = \text{Softmax}(z^{(2)})
]
Where:
-
( x ): input vector (flattened image)
-
( W ): weight matrix
-
( b ): bias
-
( f ): activation function (e.g., ReLU)
-
( \hat{y} ): predicted probabilities for each class
⚡ 3.4 Activation Functions
Neural networks rely on activation functions to introduce non-linearity.
Without them, your network would behave like a simple linear regression model.
Common activation functions:
| Activation | Formula | Range | Used For |
|---|---|---|---|
| ReLU | ( f(x) = \max(0, x) ) | [0, ∞) | Hidden layers |
| Sigmoid | ( f(x) = \frac{1}{1 + e^{-x}} ) | (0, 1) | Binary classification |
| Softmax | ( f(x_i) = \frac{e^{x_i}}{\sum_j e^{x_j}} ) | (0, 1) | Output probabilities |
For MNIST, we’ll use:
-
ReLU for hidden layers
-
Log Softmax for output layer (since we’re using a log-likelihood loss)
🏗️ 3.5 Implementing the Model in PyTorch
Let’s define our simple feedforward neural network.
import torch
import torch.nn as nn
import torch.nn.functional as F

class MNISTClassifier(nn.Module):
    def __init__(self):
        super(MNISTClassifier, self).__init__()
        self.fc1 = nn.Linear(28*28, 128)  # Input → Hidden Layer 1
        self.fc2 = nn.Linear(128, 64)     # Hidden Layer 1 → Hidden Layer 2
        self.fc3 = nn.Linear(64, 10)      # Hidden Layer 2 → Output Layer

    def forward(self, x):
        # Flatten the image (batch_size, 1, 28, 28) → (batch_size, 784)
        x = x.view(x.size(0), -1)
        x = F.relu(self.fc1(x))      # Activation after Layer 1
        x = F.relu(self.fc2(x))      # Activation after Layer 2
        x = F.log_softmax(self.fc3(x), dim=1)  # Output probabilities
        return x
Explanation:
-
nn.Linear(a, b)→ creates a fully connected layer fromainputs toboutputs. -
F.relu()→ applies ReLU activation. -
F.log_softmax()→ outputs log-probabilities for each of the 10 digits.
Sponsor Key-Word
"This Content Sponsored by SBO Digital Marketing.
Mobile-Based Part-Time Job Opportunity by SBO!
Earn money online by doing simple content publishing and sharing tasks. Here's how:
Job Type: Mobile-based part-time work
Work Involves:
Content publishing
Content sharing on social media
Time Required: As little as 1 hour a day
Earnings: ₹300 or more daily
Requirements:
Active Facebook and Instagram account
Basic knowledge of using mobile and social media
For more details:
WhatsApp your Name and Qualification to 9994104160
a.Online Part Time Jobs from Home
b.Work from Home Jobs Without Investment
c.Freelance Jobs Online for Students
d.Mobile Based Online Jobs
e.Daily Payment Online Jobs
Keyword & Tag: #OnlinePartTimeJob #WorkFromHome #EarnMoneyOnline #PartTimeJob #jobs #jobalerts #withoutinvestmentjob"
🧩 3.6 Model Summary
We can now create and inspect our model:
model = MNISTClassifier()
print(model)
Output:
MNISTClassifier(
  (fc1): Linear(in_features=784, out_features=128, bias=True)
  (fc2): Linear(in_features=128, out_features=64, bias=True)
  (fc3): Linear(in_features=64, out_features=10, bias=True)
)
This shows:
-
784 → 128 → 64 → 10 structure
-
Bias terms are automatically included by PyTorch
🔍 3.7 Counting Trainable Parameters
Let’s see how many parameters our model will learn:
total_params = sum(p.numel() for p in model.parameters() if p.requires_grad)
print("Total Trainable Parameters:", total_params)
Output:
Total Trainable Parameters: 101,770
Each connection between neurons adds to the total parameters.
The network learns all of these weights and biases during training.

💡 3.8 Why Start with a Fully Connected Model?
Even though Convolutional Neural Networks (CNNs) perform better on image tasks, starting with a simple fully connected network is essential because it helps you understand:
-
How data flows through layers
-
How weights and biases change
-
How activations shape learning
It’s like learning to walk before running — mastering FCNNs helps you grasp the core concepts before moving to CNNs.
⚙️ 3.9 Preparing the Model for Training
Before we train, we’ll define:
-
Loss Function:
nn.CrossEntropyLoss()(for multi-class classification) -
Optimizer:
torch.optim.Adam()(for adaptive gradient descent)
import torch.optim as optim

criterion = nn.CrossEntropyLoss()
optimizer = optim.Adam(model.parameters(), lr=0.001)
🧾 3.10 Summary of Section 3
By the end of this section, you’ve:
✅ Learned how fully connected networks work
✅ Built a 3-layer neural network using PyTorch
✅ Prepared it for training with optimizer and loss function
You now have a functioning neural network ready to learn from MNIST data!
🧩 Section 4: Building the Neural Network with PyTorch
Now that our data is ready, it’s time to build the neural network — the core of our MNIST image classifier.
In PyTorch, models are typically defined using the nn.Module class, which allows you to build flexible and reusable deep learning architectures.
🔹 4.1. What is nn.Module?
Every neural network in PyTorch is a subclass of torch.nn.Module.
It acts as a base class that provides the fundamental building blocks to define and manage layers, perform forward passes, and keep track of model parameters.
Here’s how it works conceptually:
-
You define your layers (e.g.,
nn.Linear,nn.Conv2d,nn.ReLU) in the__init__()method. -
You define how data flows through the model in the
forward()method.
🔹 4.2. Designing Our MNIST Classifier
Each MNIST image is 28×28 pixels, flattened into a 784-dimensional vector.
We’ll build a simple feedforward neural network with the following structure:
| Layer | Type | Input → Output | Activation |
|---|---|---|---|
| 1 | Linear | 784 → 128 | ReLU |
| 2 | Linear | 128 → 64 | ReLU |
| 3 | Linear | 64 → 10 | Softmax (via CrossEntropyLoss) |
Note: We don’t explicitly apply
Softmaxat the end becauseCrossEntropyLossin PyTorch already includes it internally.
Sponsor Key-Word
"This Content Sponsored by SBO Digital Marketing.
Mobile-Based Part-Time Job Opportunity by SBO!
Earn money online by doing simple content publishing and sharing tasks. Here's how:
Job Type: Mobile-based part-time work
Work Involves:
Content publishing
Content sharing on social media
Time Required: As little as 1 hour a day
Earnings: ₹300 or more daily
Requirements:
Active Facebook and Instagram account
Basic knowledge of using mobile and social media
For more details:
WhatsApp your Name and Qualification to 9994104160
a.Online Part Time Jobs from Home
b.Work from Home Jobs Without Investment
c.Freelance Jobs Online for Students
d.Mobile Based Online Jobs
e.Daily Payment Online Jobs
Keyword & Tag: #OnlinePartTimeJob #WorkFromHome #EarnMoneyOnline #PartTimeJob #jobs #jobalerts #withoutinvestmentjob"
🧠 4.3. Implementation
import torch
import torch.nn as nn
import torch.nn.functional as F

# Define the Neural Network
class MNISTModel(nn.Module):
    def __init__(self):
        super(MNISTModel, self).__init__()

        # Define layers
        self.fc1 = nn.Linear(28 * 28, 128)  # Input layer
        self.fc2 = nn.Linear(128, 64)       # Hidden layer
        self.fc3 = nn.Linear(64, 10)        # Output layer (10 classes)

    def forward(self, x):
        # Flatten image tensors: [batch, 1, 28, 28] → [batch, 784]
        x = x.view(x.size(0), -1)

        # Apply layers with activations
        x = F.relu(self.fc1(x))
        x = F.relu(self.fc2(x))
        x = self.fc3(x)  # Output logits

        return x

# Instantiate the model
model = MNISTModel()
print(model)
Output:
MNISTModel(
  (fc1): Linear(in_features=784, out_features=128, bias=True)
  (fc2): Linear(in_features=128, out_features=64, bias=True)
  (fc3): Linear(in_features=64, out_features=10, bias=True)
)
🔹 4.4. Understanding the Forward Pass
Let’s take a deeper look at the forward() function:
x = x.view(x.size(0), -1)
This line flattens each 28×28 image into a 1D tensor of 784 values, as nn.Linear expects 1D inputs.
Then:
-
The data flows through two hidden layers with ReLU activation functions.
-
The final output (
fc3) produces 10 logits, one for each digit (0–9).
🔹 4.5. Checking the Output Shape
You can test the model by passing a dummy batch of data through it:
dummy_input = torch.randn(64, 1, 28, 28)  # batch of 64 images
output = model(dummy_input)
print(output.shape)
Expected Output:
torch.Size([64, 10])
This means for each of the 64 images, the model produces a 10-dimensional vector — one score for each digit.
🔹 4.6. Why ReLU Activation?
ReLU (Rectified Linear Unit) introduces non-linearity and helps prevent the vanishing gradient problem.
[
f(x) = \max(0, x)
]
This makes training faster and more stable compared to traditional activations like sigmoid or tanh.
🔹 4.7. Model Summary
At this stage, we have:
-
A three-layer fully connected neural network
-
Ready to take in flattened MNIST images
-
Outputs logits for 10 classes (digits 0–9)
Sponsor Key-Word
"This Content Sponsored by SBO Digital Marketing.
Mobile-Based Part-Time Job Opportunity by SBO!
Earn money online by doing simple content publishing and sharing tasks. Here's how:
Job Type: Mobile-based part-time work
Work Involves:
Content publishing
Content sharing on social media
Time Required: As little as 1 hour a day
Earnings: ₹300 or more daily
Requirements:
Active Facebook and Instagram account
Basic knowledge of using mobile and social media
For more details:
WhatsApp your Name and Qualification to 9994104160
a.Online Part Time Jobs from Home
b.Work from Home Jobs Without Investment
c.Freelance Jobs Online for Students
d.Mobile Based Online Jobs
e.Daily Payment Online Jobs
Keyword & Tag: #OnlinePartTimeJob #WorkFromHome #EarnMoneyOnline #PartTimeJob #jobs #jobalerts #withoutinvestmentjob"
Comments
Post a Comment